

Only custom checklists can be moved between groups. To move a built-in template checklist, your best strategy is to create a copy of the built-in checklist and then move the copy into the desired group. This tutorial applies to the following modules:
- Facilities & Buildings
- Fire/Code Enforcement
- Parks & Playgrounds
- Roads & Highways
- Sportfields & Tracks
- Work Orders
- Workplace Safety
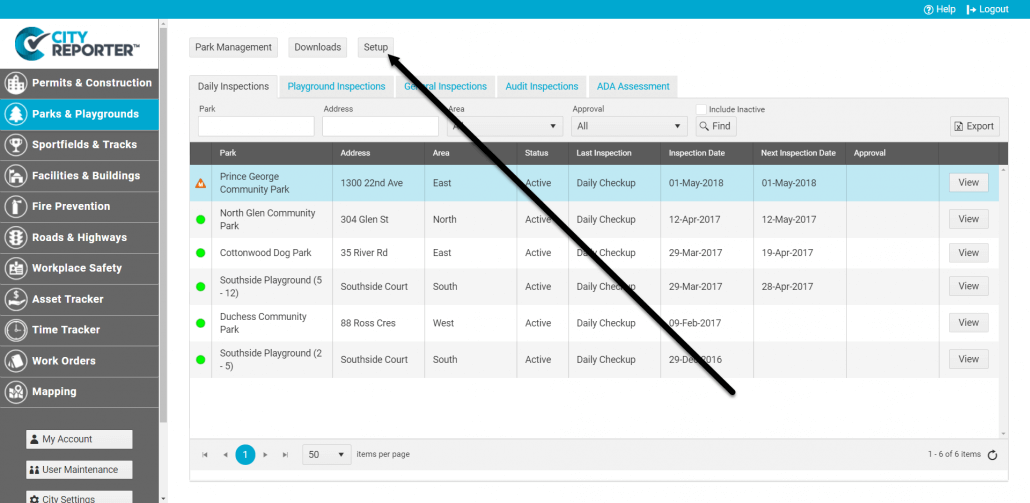
1. Using your computer, log into CityReporter web with your city code, username, and password. Select a module and click the Setup button at the top of the screen, as shown. You must have Administrator permissions to access the Setup button.
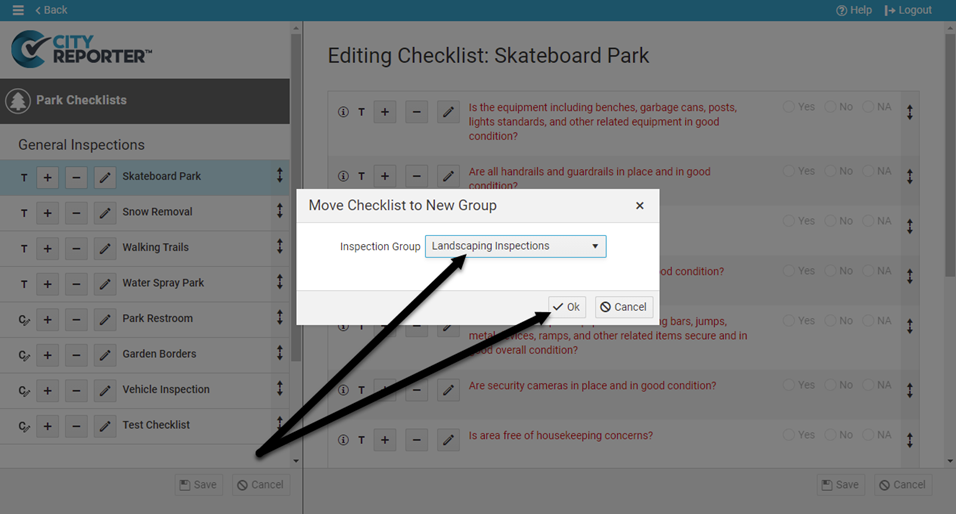
2. For this example, we created a new inspection group called “Landscaping Inspections”. We will then move a checklist out of the General Inspections group into the new Landscaping Inspections group.
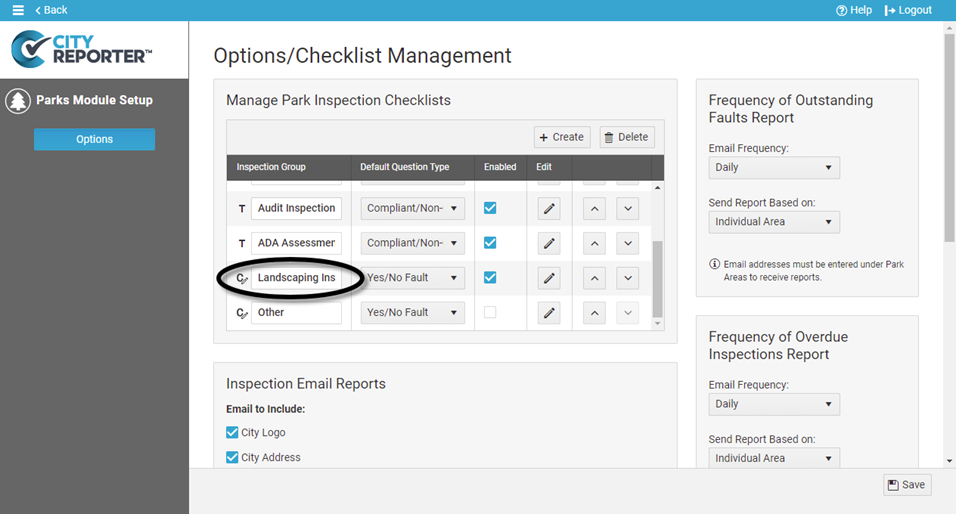
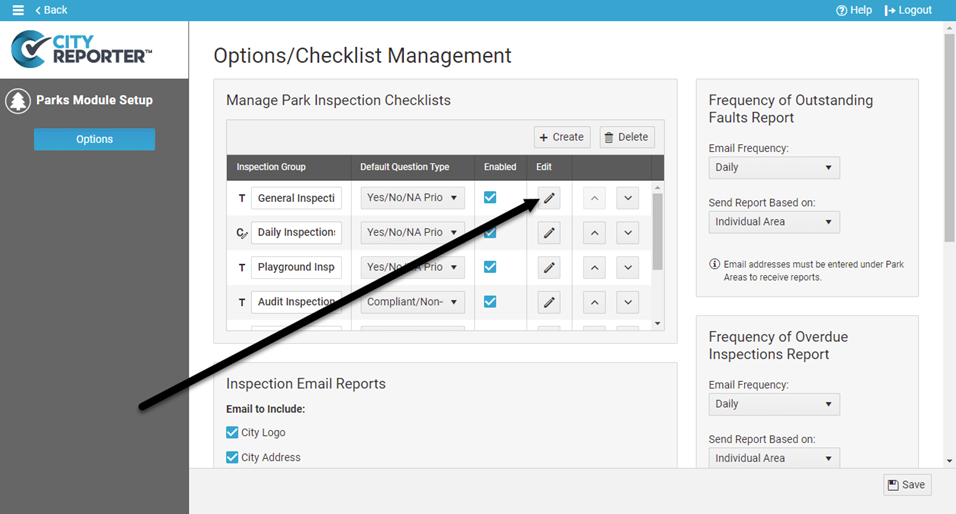
3. Click on the Edit button beside the inspection group that has the checklist you wish to move. In this example, we’re going to open the General Inspections group because we want to move our Garden Borders checklist into the newly created Landscaping Inspections group.
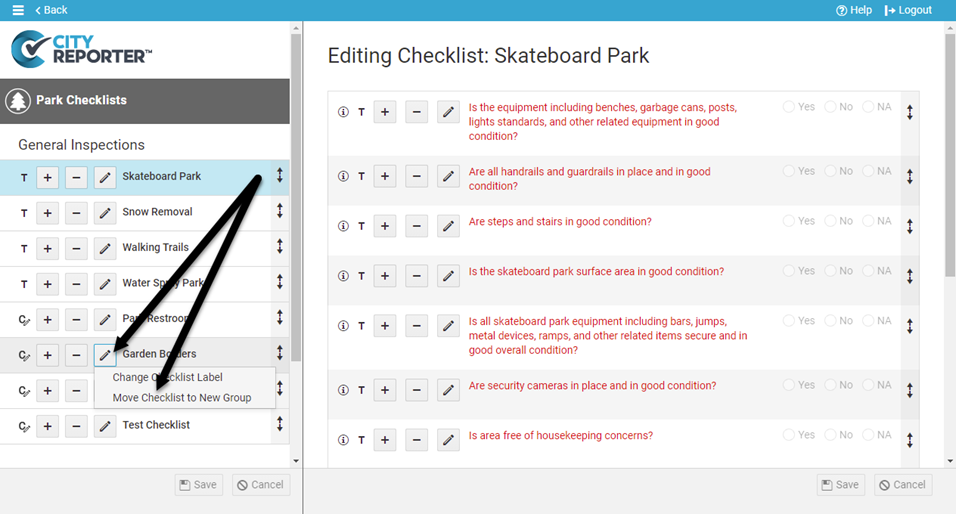
4. Click the Pencil button beside the Garden Borders custom checklist. Select the Move Checklist to New Group option on the menu, as shown below. Custom checklists are indicated with the C icon. Template checklists, as indicated by the T icon, do not have the option to Move Checklist to New Group.
5. Use the drop-down menu to choose where you want to move the Garden Borders custom checklist, then click OK. In this example, the custom checklist will be moved from the General Inspections group into the Landscaping Inspections group.
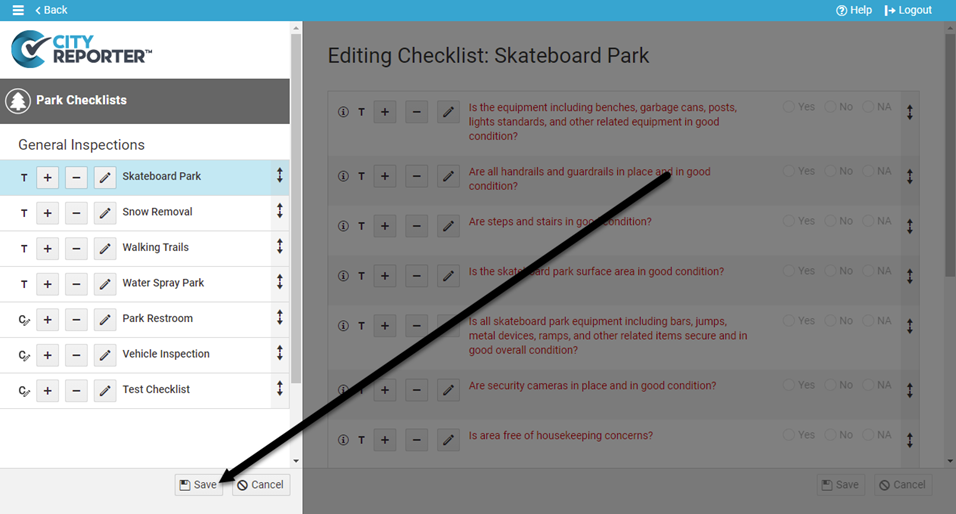
6. Since you have made a change to the checklists in this group, you need to save your changes. Click the Save button at the bottom left of the screen as shown below. (If you leave this page without saving your changes, the checklist will not be moved)
7. Repeat these steps for any additional custom checklists you want to move between groups.